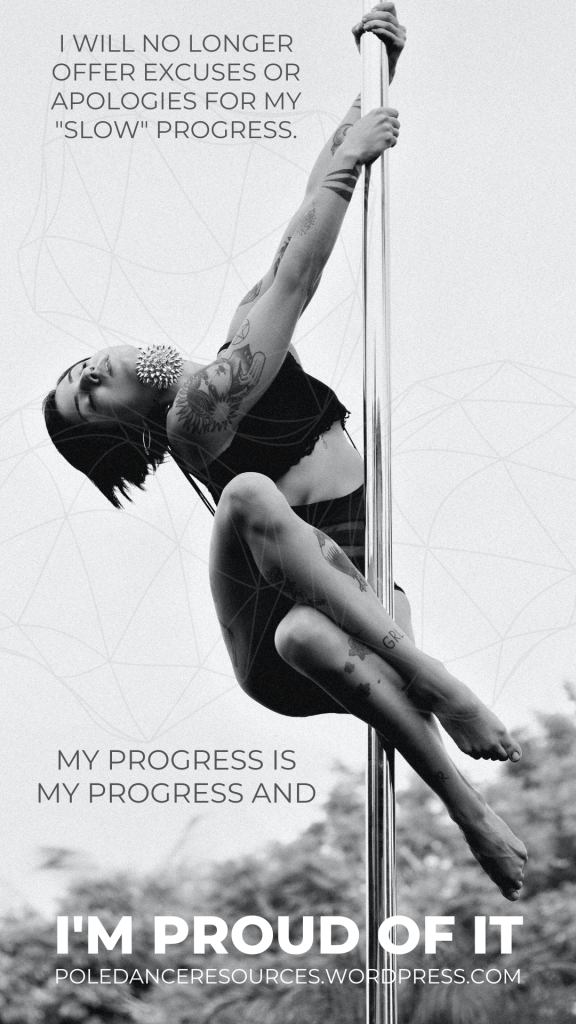
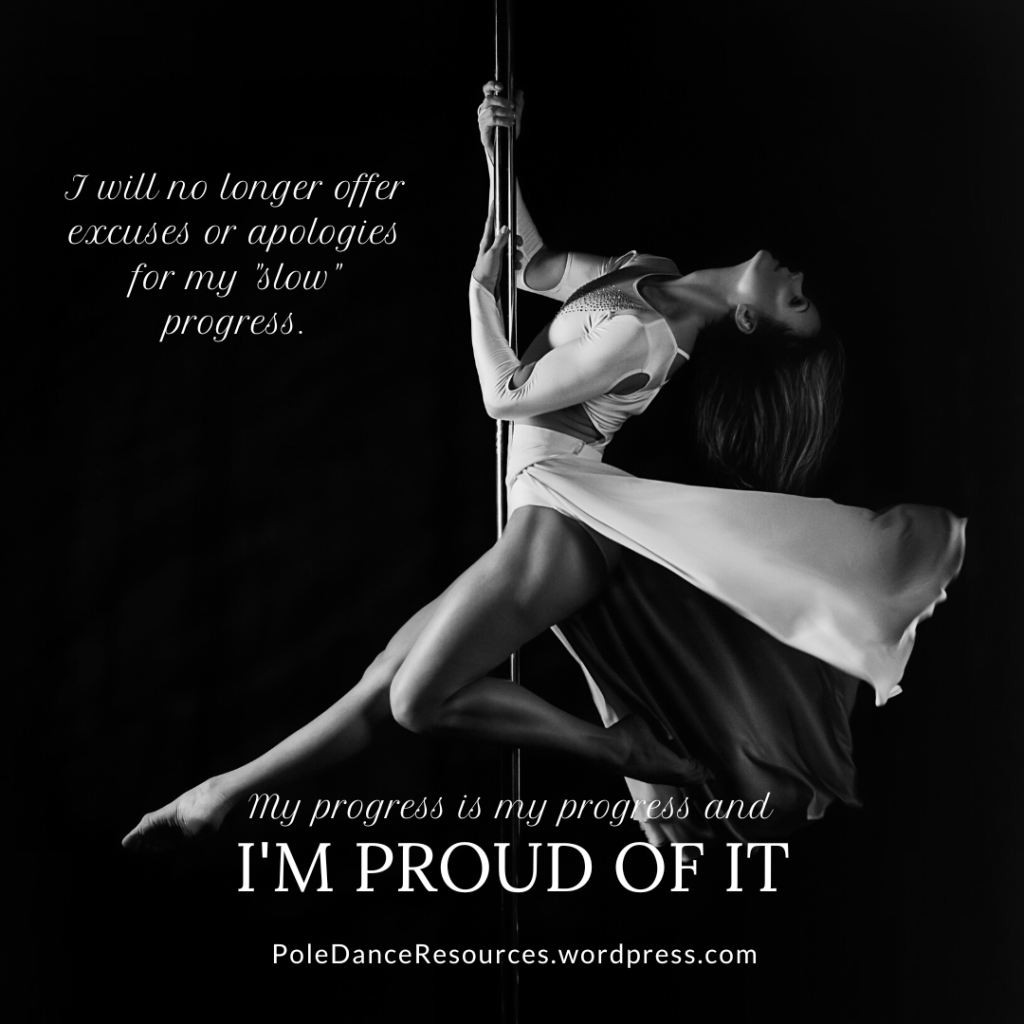
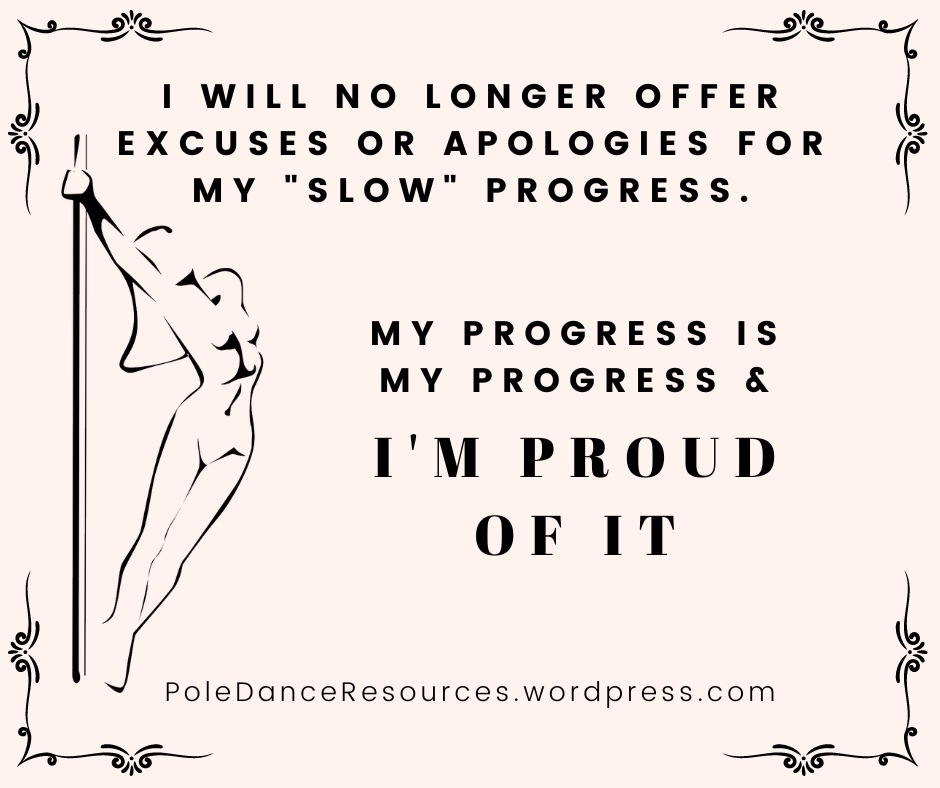
You would think based on the title of this post that I’m here to give you a swift kick in the butt, to administer that little shove toward better workouts, more consistency, solid effort. You would be wrong.
I’m here to give you permission to STOP making excuses for yourself, your body, your rate of progress. I struggle with this personally, always feeling like I’m months or years behind the average pole dancer.
Maybe I am. If so, who cares? This is MY unique journey. And it isn’t a race.
Once I decided to stop saying things like, “I’m really slow to learn” or “I struggle to do things everyone else has mastered” or “It has taken me a really long time to get here” I felt a weight lift off my shoulders. I enjoy pole dance. I enjoy the challenge. I love the workout. I’m honestly really proud of myself. So when I post a photo or video of my pole dance, I will no longer add a comment that pre-acknowledges my slowness before anyone else can call me out on it.
The pole dance community is THE most welcoming, accepting, and supportive communities I’ve ever been involved with. You are all badass and amazing in so many ways. Just because the rest of the world judges quickly and is petty, when I’m here with all of you, I can let that go and be me.
If you feel the same, grab one of the images below and share it. Hold yourself accountable, share the sentiment, and spread self-forgiveness.
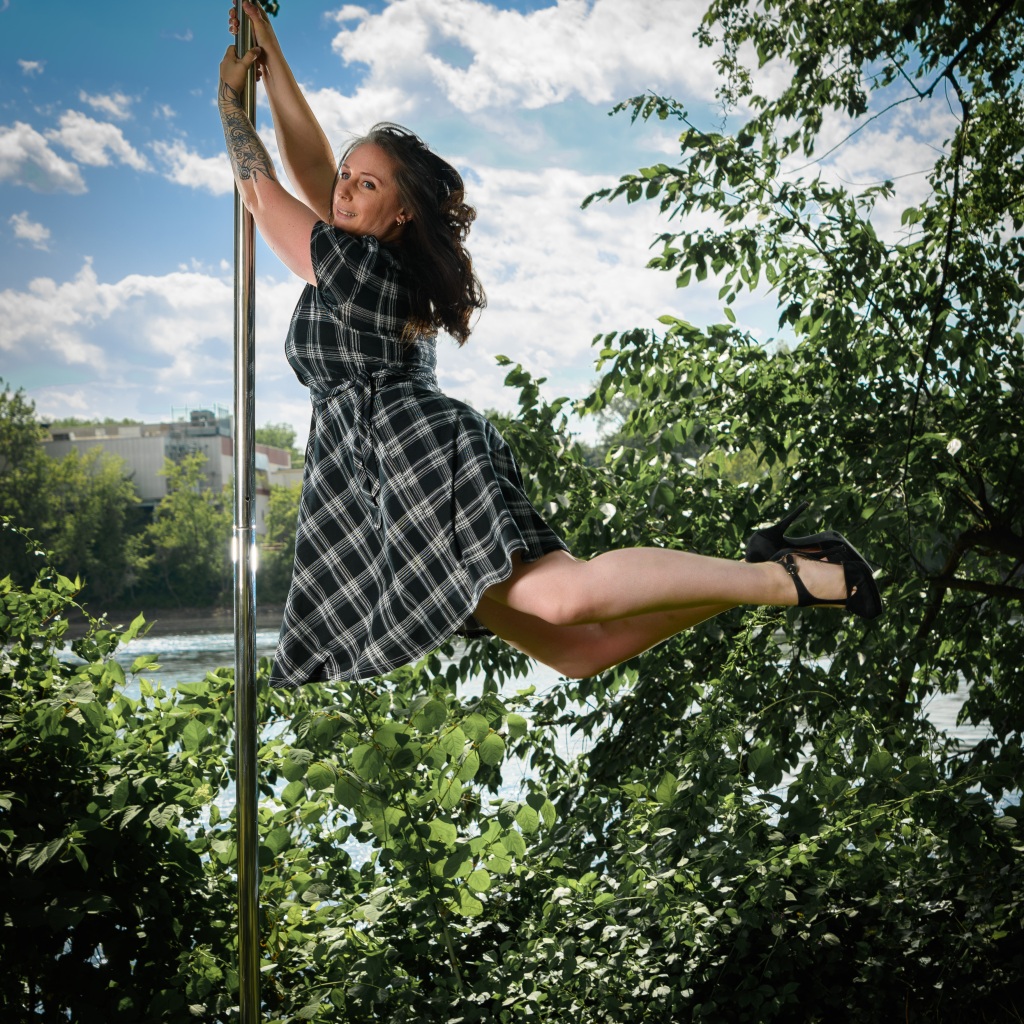
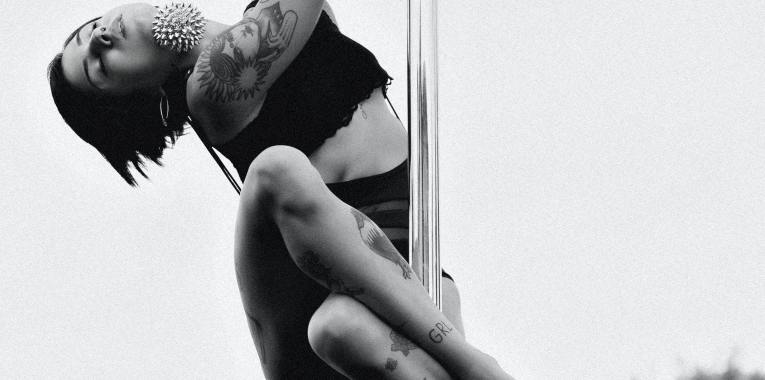
As a photographer and pole dancer, I snatched up the opportunity to partake in a photoshoot even though I didn’t feel I had any moves to show off. So I did some research and gathered ideas. I practiced at home while recording on video so I could freeze frame and figure out my favorites. I highly recommend following this same strategy for your next pole dance photoshoot. It helped me so much!
Since I went through all that work, I thought I’d share the research and discoveries. Here were all my test shots from ideas I gathered all over the internet.
Here were my favorites from the final photoshoot by SRC Imaging.
I went into pole dancing with certain expectations. And those expectations, for the most part, were wildly wrong! When I finally decided to go for it, I had to wait until I made a visit back home because there were no pole studios anywhere near me at the time. So on my one week visit home, I booked two classes.
I remember during my very first class thinking, “Why is my body so damn heavy? And my hands so weak?” But it was so incredibly fun to spin around and make shapes with my body! I was quite sore the next day and couldn’t lift anything, especially myself (as in, getting out of a chair with the help of my arms haha). I had class again two days later, and my body just refused to do anything. I was so disappointed in myself.
It took a few years before I moved back to my home state and was able to take up pole on a regular basis. There I was starting all over again. For some reason, it went a little better the second time around. Maybe because I knew what to expect. Maybe I warmed up better or stretched better or ate better or was more hydrated. Who knows?! But I managed to do a few basic things during my class.
Like many of my lovely fellow pole dancers, I struggled in those first few months with everything from sliding off the pole, losing strength in my hands, bruising like a peach, not having the flexibility to wrap myself around the pole the way I needed to, etc. I was heavy, weak, and stiff. UGH!
I’m no quitter though, so I just kept pushing. Three pole sessions per week and conditioning in between. I was ALL IN. Until a certain shoulder of mine decided to act up. I was no wuss though either. Ain’t no pain gonna keep me from my happy place.
Until it did because daaaaammmnnn, you just can’t ignore an injury. After almost two months of healing (read about it here) followed by many weeks of Covid-19 illness and its aftermath of zero energy, I finally got back to full-time pole. Thankfully, I hadn’t lost all my strength. But I had to work hard to build myself back up again.
I discovered I had been pushing myself too hard. So I backed off to two pole sessions per week (one in studio and one at home) with one to two cross training sessions in between (10-20 minutes typically) and at least one running day.
Around the eight or nine month mark, I started to feel like I could do things. I was able to string a few moves together before my hands or other grips gave out. I was starting to go upside down, even if it was from the top down. (Stupid chopper. I hate you.) And I was so so so happy to realize I wasn’t getting as sick anymore on spin. Woot! Halle-freaking-lujah!
I just passed my one year anniversary. (Yes, yes, I know. Poleaversary.) And now I feel like a pole dancer. I’m staying on the pole for five or six or seven moves without falling or sliding off, dancing for one to two minutes without dying for lack of oxygen, and bending just enough to start getting those hard moves. I certainly wish I could have progressed faster than I have, but I’m so very happy I’m here at all, especially at age 44. I’m very grateful for my hubby who 1) spent over $500 on my Lupit dance pole, 2) is happy for me and my sport, judgment free, and 3) doesn’t try to stop me from being a crazy upside-down pole trickster who might fall on her head someday. ❤ ❤ ❤
What was your first year of pole dancing like? Where are you in your journey now?
DISCLAIMER: THIS WEBSITE DOES NOT PROVIDE MEDICAL ADVICE
The information, including but not limited to, text, graphics, images and other material contained on this website are for informational purposes only. No material on this site is intended to be a substitute for professional medical advice, diagnosis or treatment. Always seek the advice of your physician or other qualified health care provider with any questions you may have regarding a medical condition or treatment and before undertaking a new health care regimen, and never disregard professional medical advice or delay in seeking it because of something you have read on this website.
I’m the type of person who pushes myself 1000 times harder than I should, especially when I care. So this one was, unfortunately, inevitable for me. I hope maybe you can learn from my mistakes. My purpose in writing this post is to let you in on my own personal experience with a shoulder injury from pole dancing so that it may help you anticipate what may be involved in healing your own injury.
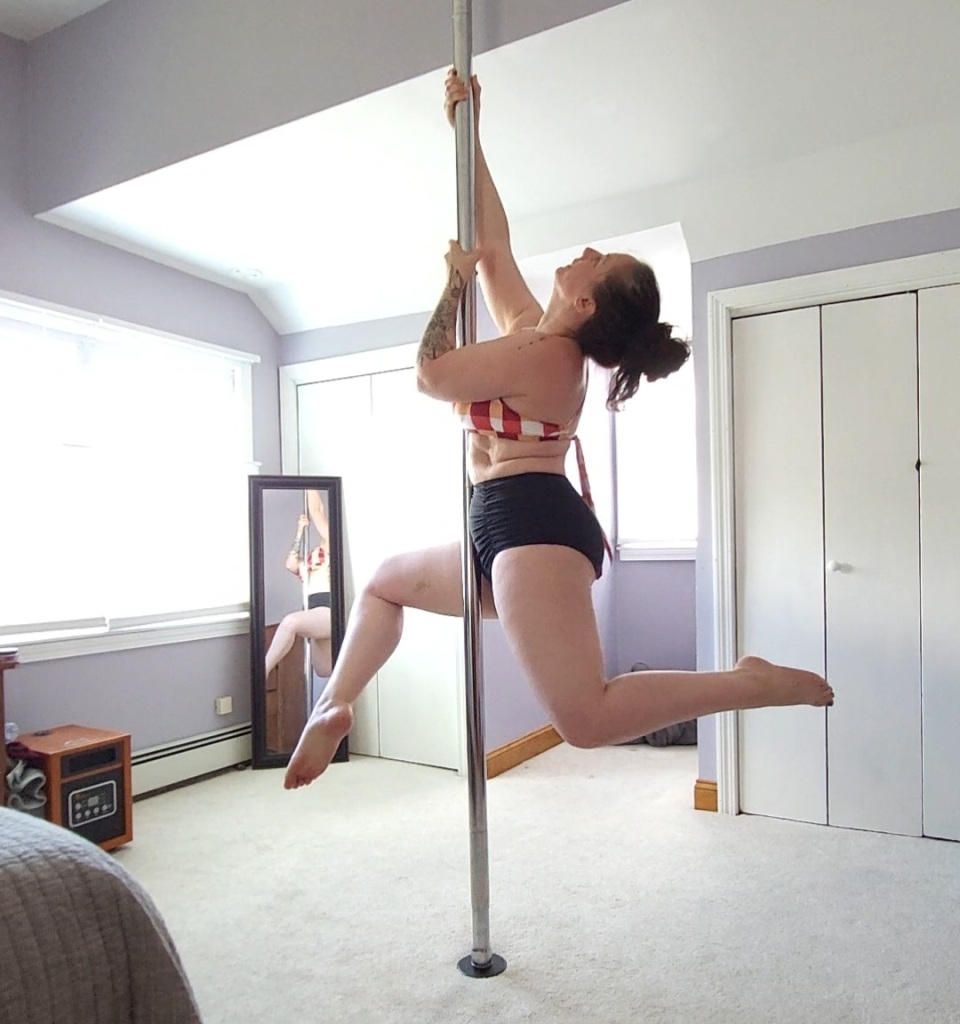
The Dancer I Am
Me (left) with my sister (right)
My background and experience may be important for understanding how I arrived at my injury. So I’ll share. I give you full permission to skim and skip ahead. 🙂
I’ve danced since I was about 10 years old. With a late start and only once-per-week lessons, I wasn’t anything special. But I enjoyed it immensely.
As a young child, I had a couple of years of gymnastics. It was scary as hell but super fun! As a kid and teen, I did everything from ballet/pointe to hip hop—all the usuals for recital schools. Later, I picked up ballroom dance, especially East Coast Swing (aerials and all) and the Latin dances. I even competed in two Latin dances! (super beginner level but we got gold!)
My first pole dance? haha
When I was about 32 years old, I gave up dance due to time limits and an annoyingly old body. (My doctor said she has to treat me like an 85-year-old.) I thought leaving dance was a permanent decision. But I just couldn’t live without it in my life.
Other than kicking back a few Nintendo JustDance! routines with my girls, my life was severely lacking in dance. I had been in love with pole dance for ages but hadn’t tried it myself because it looked too hard, and I was rather devout in my faith at the time, which would have frowned on it.
Finally, at age 43, I put all the stigmas and my own insecurities aside and took up pole dance.
How It All Started
Without much physical fitness for years before, I jumped right in as if I’d never stopped moving.
Example: Hobo hook
It was SO hard in the beginning. I was SO frustrated that I couldn’t hold myself on the pole for even ONE full move. When I tried basic spins like chair and front/back hook, I dangled from my arm(s) like a hobo rather than holding myself up in a beautiful pole dance posture with proper back support.
I started to add off-pole conditioning to improve, which was a challenge because I was doing pole dance 3 times per week already and knew that my muscles needed recovery time in between sessions.
I ended up starting every pole session with about 15-20 minutes of off-pole conditioning. Then on-pole conditioning for 5-10 minutes. Then I’d work on moves and tricks. Eventually when I could hold myself up for 1-2 moves in a row, I would add some basic combos to the end of my sessions.
In between pole & conditioning days, I was running. I kept thinking if I could get rid of the extra 30 pounds I’d gained through the pandemic, it would be a lot easier to hold myself up. (I still have not lost this weight (nor inches) 10 months into my journey.)
My current method of tracking self-care
In class (and sometimes at home), I started hearing and feeling a sort of clicking or popping in my right shoulder. It felt very similar to cracking your knuckles but the pop was a deeper kind of thud inside my arm. When we’d warm up with arm circles, it would pop, pop, pop on each rotation.
I tend to push myself way harder than I should, so I just kept moving and kept pushing. In class especially, I’d practice a move on my right side, then immediately on my left, then back to my right, etc. I wanted to work both sides evenly but also was trying to give each side a little rest between moves. I thought that would be enough recovery time so that I wasn’t overdoing it. And I felt so lazy and dumb just standing there next to my pole resting.
I now know that I should have taken more time between sets, even though I was switching sides often. (Here’s where some say there’s a benefit to sharing a pole in class. It forces you to rest.) And I have learned now how to recognize when my body is done and needs a break. It all comes back to the, “Take your time and go at your own pace” rule that I so blatantly ignored.
The clicking and popping continued as I kept pushing myself, but then I also started to feel a dull ache in my shoulder whenever I wasn’t on pole or conditioning. It wouldn’t go away and it slowly got worse. I asked my coach about it, and she said it was likely injured and I should take some time to rest completely. Boo!!
I Can Fix This Myself….NOT
I did all kinds of research online to see what I should do about a pole dance shoulder injury. Most of what I read warned me that if I didn’t see a doctor soon enough and it was a big injury, I would cause permanent damage. I tried to assess if I felt it was serious or not based on the symptoms. It didn’t seem very serious. (Thankfully in the end, it wasn’t.)
In class with my taped shoulder.
So I followed the guidelines to stay off of it for at least 2 weeks or until the pain went away. At about 1.5 weeks, I convinced myself I felt better. I was very impatient to keep up my progress and had already paid for a class bundle that was going to expire. (Note to studio owners: PLEASE create some sort of hold or partial refund for these when a student has an injury.) So I took the least shoulder-intensive class I could find—a flexibility class. It focused on stretches and poses around the base of the pole. With my feet on the floor, I figured it was a safe bet. I taped up my shoulder with KT Tape Pro and headed to class. Then another class a few days later. Then all the classes I could fit into my schedule.
Unfortunately, my shoulder wasn’t anywhere near healed. I made it worse without knowing it. (If I’m being honest, I knew but didn’t want to admit it. Because who wants to quit pole when you’re finally about to reach level 2?!)
When my shoulder ached so badly that I couldn’t sit still throughout the day, I decided it was time to get professional help. I wasn’t even sure who to call. I looked up sports therapy doctors but that ended up taking me way high up on the chain of command when it comes to sports injuries. It would be like calling in a brain surgeon for a headache. First, figure out what’s causing the headache before you head to the surgeon.
Someone finally suggested that my chiropractor would likely be able to diagnose and treat my shoulder. That was good news because I adored my chiropractor.
Call In The Pro
Instructions from my chiropractor
At my first visit to the chiropractor, he had me try all kinds of arm/body movements and stretches to assess how bad the injury was. He determined that it was a minor injury, what he labeled tendonitis. He ordered me off of all aerial work and yoga and assigned me some massaging exercises.
Similar to using a foam roller, he showed me how to use a lacrosse ball (not tennis ball because tennis balls are bigger and slippery) against the wall to roll out all of the muscles connected to my shoulder. This was painful AF but very important. In fact, when I left his office the first time, I felt bruised all over from how deeply he massaged the area.
He instructed me to use the lacrosse ball to massage my entire upper arm and shoulder hourly for the first few days, then a few times a day until it healed. He estimated that with very good and diligent work on my shoulder, it would take me a minimum of a month to heal fully. Realistically, more like two months. #SoSad
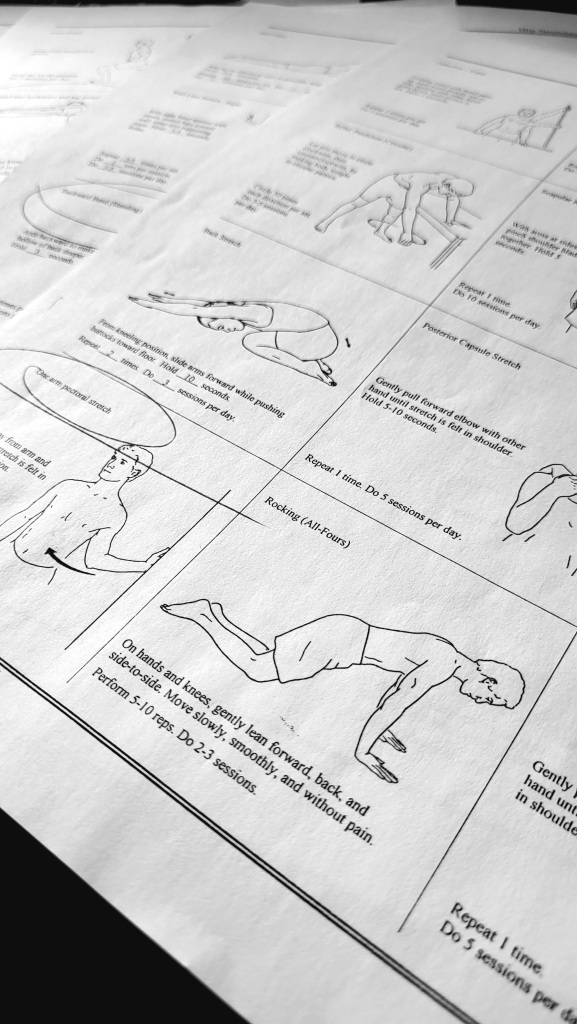
He also sent me home with a few pages of printed stretches and exercises with the appropriate ones circled. Have I mentioned how awesome he is?
The One Week Check-In
How I used a lacrosse ball between myself and the wall to roll out my injured shoulder muscles
After a week, I returned for a checkup. I felt that my shoulder had gotten quite a bit better but there were still waves of achiness. Meaning, my shoulder would feel healed one day, but the next two days would be painful again. So I was curious how my check-in would go.
He again had me stretch and move in various ways to assess the damage. My shoulder had indeed improved a good deal. However, I hadn’t understood the importance of how far out the injury extended to surrounding muscles.
The areas to massage included all around my shoulder blades on my back, up my neck, across the top of my shoulder, over the curve of my shoulder, all over my upper arm front & back from elbow to shoulder (this part was especially tender), and across my chest from my armpit to the extent of the soft tissue. (I promise to post a video soon showing all of this process!)
So while my upper arm and shoulder felt a lot better because I had worked it with the lacrosse ball, my mid bicep to elbow was still SUPER tender.
He reviewed with me exactly how and where I should use the lacrosse ball to roll out my tense muscles. And he confirmed for me that even if I had worked all the muscles properly, I would still experience what felt like good days and bad days. It was all part of the healing process. So good to know!
The Three Week Check-In
At three weeks, I headed back to the doc for a new assessment. My shoulder felt great with only minor achiness every 4-5 days. He gave me a gold star for my progress and assigned new strengthening exercises. I was to start working the exercises three times per week along with the massage/ball rolling. (I’ll share videos of these exercises too!)
Hindsight And All
Hindsight is 20/20 and that’s never been more true for me than with this shoulder injury. Looking back, I can clearly pinpoint the warning signs before the injury.
I was super tight all around my shoulders. In fact, when clasping my hands behind my back, bending forward and trying to lift my arms away from my body, I couldn’t. Everything was so tight that I could barely peal them away from my body. I’m talking an inch at most, guys. SO TIGHT.
The clicking and popping was the biggest red flag. Now that I know how to care for my shoulders, I never have clicking and popping. If I slack off on warming up before my home pole sessions or slack off on rolling my muscles out when they feel tight, the clicking will start again. I hop right back on the rolling and stretching and it’s gone in a day. Learn how to use foam rollers. It’s going to save your body. I now use foam rollers on other parts of my body too, especially upper legs and hips.
Aching in my shoulder joint. I didn’t feel this until I’d already gone way too far without taking care of my body. So if you’re feeling a constant ache that goes on longer than 2nd day soreness, take care of it.
Ongoing Care
Foam and ball rolling are now part of my daily life. I can skip a day, sometimes two. But more than that and I start to feel tight and off. I’ve learned how important it is to fully warm up before pole (at least 5 minutes, if not 10). And I’ve learned to not cheat my after-workout stretching sessions either. Holding a stretch for 10-15 seconds isn’t enough. 30 seconds minimum. If I feel a weird twinge during a session or feel that I might have pulled a muscle, I immediately get on the lacrosse ball rolling routine and I have always healed within a day or two.
Please take care of your amazing body and help it perform well for you. ❤
For reference, these were my details at the time of writing this review: height: 5’3″ weight: 178 lbs size purchased: XL body type: short-waisted pole experience: 3 months
The Search
The more sports bra in my closet (well, drawer) the better! So anything cute and inspiring with enough support for a D cup is on my wish list.
I learned from another sports bra that it’s important in pole not to have any thick seams at the top of the shoulder straps because shoulder mounts (and even some body waves) really hurt when you’ve got bunched up fabric pressing into you. So that was an important style feature for me.
As much as I love the look of bralettes that have some length under the chest, they don’t work out super well for me, being short-waisted. So I have to keep the thickness of the bottom band in mind when choosing a sports bra.
I really wanted padding that stays in place too but that’s hard to determine when purchasing online.
To break it down, here were my goals:
Cute (very important)
No thick shoulder seams
Supportive
The Find
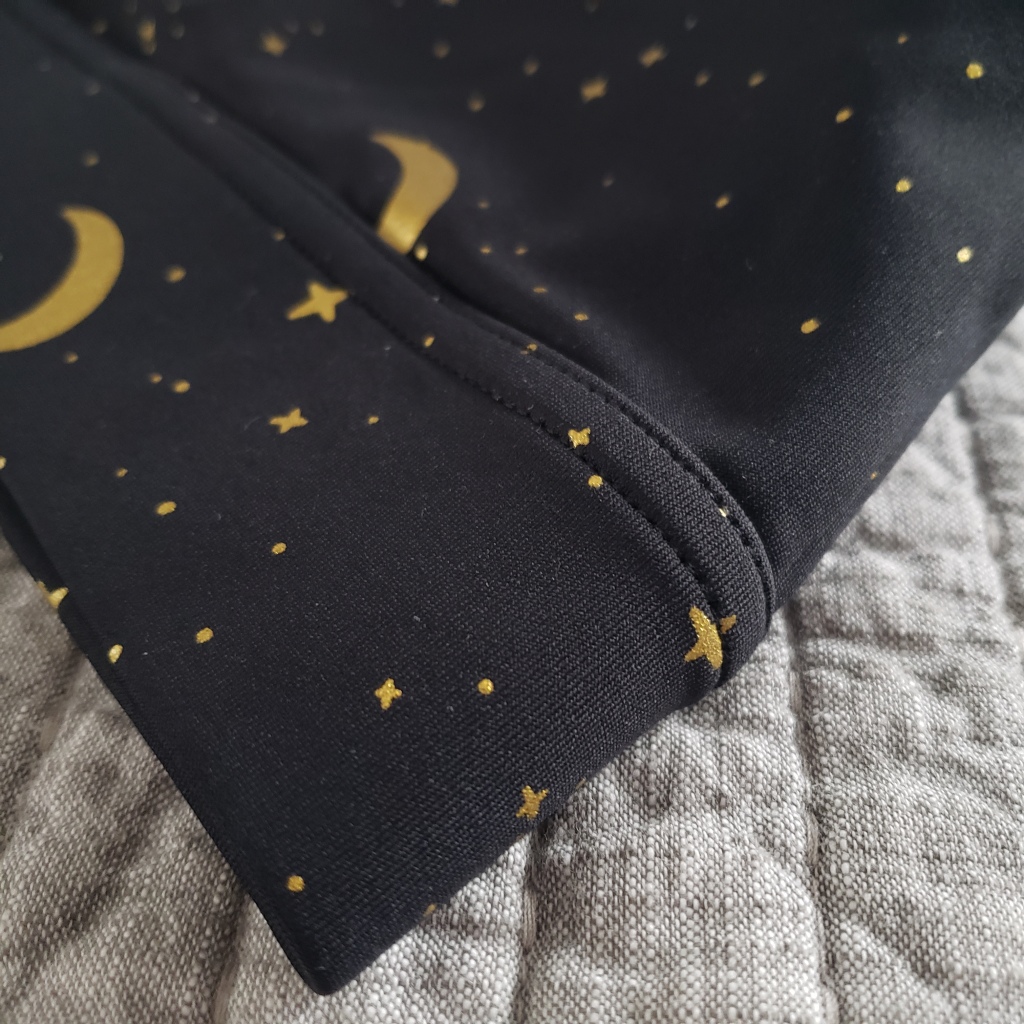
I found the Criss Cross Sports Bra from Maven Thread and really loved the moon and stars pattern! It fit a lot of my other requirements as well, and I liked the criss-cross strappiness of this. It looked pretty but also seemed like it would be supportive. And I was right! The bra is just right. It’s snug enough to support me but not so snug that I pull a muscle trying to get it off.
Great criss-cross design
The tops of the shoulder straps sit smoothly against my skin and didn’t get in the way during pole-to-shoulder moves.
Smooth shoulder seams
I love the quality of the fabric and stitching.
Beautifully stitched
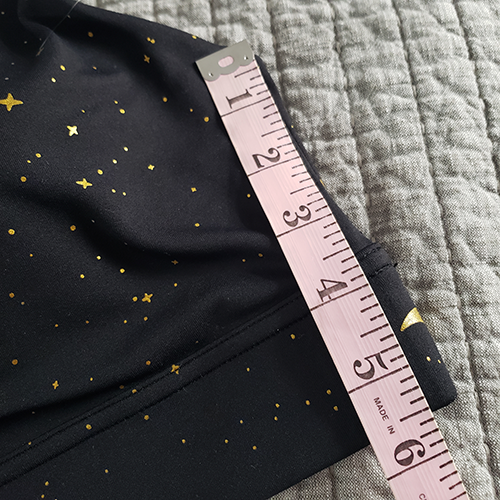
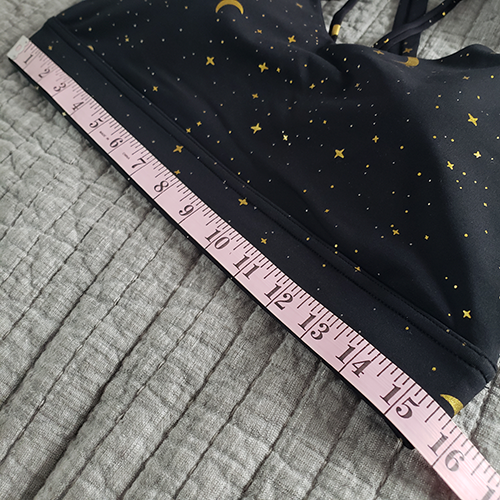
Here are some measurement photos for your reference. Measure a bra in your stock that fits you well to compare.
tldr;
Great quality, fits nicely. Beautiful seam work and style. No complaints. Would definitely buy again.
Many of my pole dance friends online have asked the community to share pictures of their home pole dance studios. So I’m sharing mine.
My Taste
I am absolutely in love with natural light. I would have it 24/7 if possible. I need it to keep me happy. So I knew I wanted a LOT of natural light wherever I set up my pole. The studio where I take classes is so beautiful with it’s hardwood floors, exposed brick, and large windows. What I wouldn’t give to have that at home!
Disclaimer: NOT my pole studio. More like my dream.
Finding a Location
Other than the fact that my basement is dark and cold, it’s the area of our home that’s most out of the way. It has the most horizontal space. But there were more issues. The ceiling is VERY low (6’10” if I remember right) so I knew I’d be really limited on the tricks I could do.
I didn’t want the pole in the middle of my living room so the only other option was our bedroom.
For lame reasons, I’d hoped not to put it in the bedroom. Stigma and all. But that was the best option I had.
Choosing a Pole
I started with a low priced Amazon pole and set it up on the flat part of my ceiling. That ceiling was also not very tall. Only 7’3″. But it was better than the basement.
I didn’t understand up front that the type of pole I bought was more for dancing around the base and not for any hard core spins on pole, especially not while inverted. My pole fell 2 times! Thankfully, I was not hurt in either incident. My wall couldn’t say the same. I had to do some heavy duty repair work on it.
After returning it, I did more research on which pole would be safer for me. I’d heard a lot about X-Pole and Lupit. X-Pole has been around longer, but Lupit was getting slightly better reviews. So I decided on Lupit. And at the same time decided to shift the pole a few inches toward my bed in order to use the higher, cathedral ceiling for a taller pole. I needed to purchase the pole (I bought mine from Lupit on Amazon since I’m in the USA), an extension, and the cathedral ceiling mount. I already felt better about having it hard-mounted to my ceiling. No way it could slip now!
Cathedral ceiling mount for Lupit dance pole
One of my [many] jobs is as an architectural designer. So watch for a blog post with tips on how to install your dance pole.
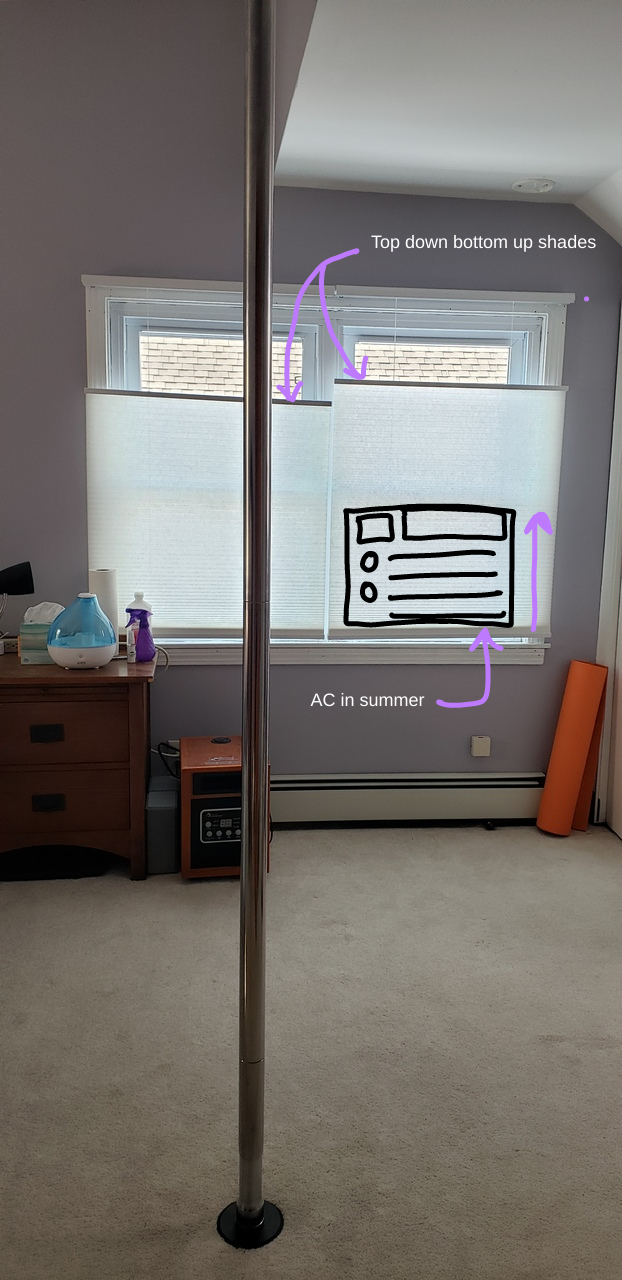
My Pole Dance Room Setup
So here is my home pole dance studio.
Some important things to note:
It’s winter here right now. So it’s super important to keep the humidity up so my skin isn’t dry. I aim for about 40% humidity.
It’s also important to keep the room warm so I can stick to the pole. I’ll run the heater on about 70 degrees for 15-20 minutes before I use the pole. Once I get started, I turn it off.
My most favorite thing about my room is the top-down bottom-up shades. I can open the top for lots of sunlight while maintaining privacy on the bottom. By ordering 2 separate shades for the double window, I can also lift the right one above the window AC unit while keeping the left one down to the sill. It was so worth the extra $$ for these shades!
Complaints
I haaaaaaaate dancing on carpet. It’s the absolute worst. I’ve tried various floor treatments on top of the carpet but none worked out. Someday, we’ll rip it all up and install hardwood floors. *big dreamy eyes*
For the most part, I have plenty of room around my pole to do everything I’ve tried. However, the pole is a little close to our bed now on one side. So I have to do bigger moves on the other side. And I have kicked the bed a few times.
It was totally worth it to shift to the cathedral part of the ceiling though. I can practice at least 2 climbs and even on lower pole moves, my hand can hold as high as it needs to, which it couldn’t do in the flat ceiling area.
What do you love and hate about your own home studio? I haven’t really fancied mine up much and I’m kind of terrible at decorating. Other than strip lights, share with me your secrets.
I hope, by sharing my timeline, that others on a similar journey can see how slow and difficult the journey is. Be patient with your bodies! Watch here for updates.
Summer 2014
While living temporarily in the mid-west, my love for pole dance grew and I was dying to try it. I had to wait until I was visiting New England again to do it. But I did. And those 3 lessons were my official start of my pole journey. It, unfortunately, took way too long to get back to it.
August 6, 2021 (what I’m calling my start)
I setup my Amazon pressure-mounted pole and started my pole fitness journey for real.
October 8, 2021 (8 weeks)
Struggled with slow progress on pole and with weight loss. Lots and lots and lots of fails.
October 23, 2021 (11 weeks)
Finally made 2 climbs. Started being able to hold moves longer than half a second. Feeling strong in conditioning exercises on and off pole. Finally feeling strong and enjoying pole!
October 27, 2021 (12 weeks)
Shoulder injury. I researched the injury and recovery on my own and was determined to handle it myself.
November 3, 2021 (13 weeks)
I finally was able to climb to the top of the pole at the studio! Ceilings are 12′ high. So ecstatic! Got Jasmine as well. (Didn’t realize I was making my injury worse.)
November 19, 2021 (15 weeks)
Mastered getting into a climb from a spin. Struggling with bracket grip still. Pole sits are starting to hurt less finally. Getting the hang of the angled hips.
November 21, 2021 (15 weeks)
Hubby and I went to watch the Pole Sport Organization competition in Boston and it was SUCH an amazing learning experience. It actually gave me a lot of confidence in my own progress.
December 1, 2021 (17 weeks)
Mastered Genie. Woot!
December 9, 2021 (18 weeks)
Shoulder was really bothering me. (clicking, popping, aching) Went to see a doc. It was definitely injured. So sad and disappointed in myself. Mine was, thankfully, a minor injury, but I received estimates of 2 months recovery time if I was very good about treatment.
January 18, 2022 (24 weeks)
Officially my first day back at pole. (After shoulder recovery AND contracting Covid) I started with 10 minutes of Pilates, then attempted a few pole crunches. Followed by a lot of foam rolling.
February 6, 2022 (26 weeks)
My first day back at class in the studio and it felt great! So happy to discover I held onto about 80% of my strength, grip, and tricks. I feel stronger in the sense that I know my body better, know the warning signs of injury, and know where I’m supposed to feel my muscles working better than ever before. Today we worked on some simple dip turns, pole sit spin transitions and stargazer. I was able to let go with my hand in stargazer only once and for just a couple of seconds.
I’ve only lost about 15 pounds from the beginning of pole work in August but I’m focusing on that success and holding steady with my plan.
February 12, 2022 (27 weeks)
First time learning:
Side climb (I managed to get one lift but couldn’t do a second)
Since this site is brand spanking new, I’d like to share with you my plans for its future. I’ve just barely scratched the surface of what I’d like to share here. But these things take time. So here are my plans for the future:
Extended clothing reviews
Lengthy reviews of the pole dance clothing I’ve purchased (beyond the snippet on the Quick Guides page). I plan to include more photos as well as videos once I wear the item for pole dancing.
Timeline
A timeline of my own personal pole fitness journey because I struggle so much with comparing myself to others who seem to be FLYING through stunts at the greatest of speeds. Meanwhile, I’m here taking baby steps and getting injuries. So I feel it’s really important (and will hopefully be useful) to others who have recently taken up pole dance or pole fitness and who are also struggling.
Personal Experience With Injury Recovery
Three months into my pole fitness journey, I injured my shoulder from pushing myself too hard. The healing process has been a learning experience for me so I’d like to share it with you to help you learn what might be involved if you were to get injured. Or to hopefully help you prevent an injury by learning from my experience. Read more.
Example Fitness Routine
For the first month or more, I was all over the board with what to do, when, and how often. I’ve danced my whole life and have run a half marathon. But pole fitness knocked me on my ass. I was so lost. I’m still working through what will work best for me to go from beginner to expert with the least injuries, but as I figure things out, I plan to share everything with you.
Pole Installation Help
Years ago, just out of high school, I worked as a draftsman for a professional building design firm (designing construction blueprints for residential home designs). When Covid-19 hit and it became difficult to sustain my professional photography business, I went back to building design. My experience there (especially with structural calculations) made it very easy for me to understand what was required in order to install my Lupit cathedral ceiling mounted pole. I plan to share details with you to help you understand the structure behind your finished ceilings and walls.
General Tips
I plan to share any general tips and tricks I pick up along the way, whether they be about diet, strength training, pole tricks, or what to wear!
There are plenty of other blogs and social media accounts out there hosted by professional pole dance trainers who will tell you just what to do to master a pole move. But they’re often quite overwhelming. And there are so many of them, it’s hard to know where to start. My hope is that I can share the experience from the other side (as the student) and help some others to find their way a little easier.
Please feel free to contact me with any requests, questions, products you love, etc. I’m like a sponge right now when it comes to pole fitness!
For reference, these were my details at the time of writing this review: height: 5’3″ weight: 180 lbs body type: short-waisted pole experience: 3 months
The Search
Since I’m short-waisted and round-bellied, I was feeling self-conscious about my soft, pasty white gut hanging out while pole dancing. I don’t typically buy high-waisted anything because it usually means the waistband cuts into my ribs and suffocates me. But this time I went on the hunt for high-waisted shorts with a little support. I also wanted shorts that were a bit cheekier to fit my pole mood.
To break it down, here were my goals:
Cover my tummy (It’s so bright!)
Tuck my tummy
Show a little cheek
The Find
I found the Betty Shorts from Mika Yoga Wear and fell in love! So cute! I love the shape of these shorts. They do sit a little high under my ribs as expected. And while they’re nice and snug and feel good, they’re not quite as snug as I’d hoped. I wish there was a bit more tummy-tucking power.
When I first put them on, they’re the perfect length and fit. While dancing, they ride up a bit, which makes them a more cheeky. That is what I was looking for but I have since decided I prefer more coverage. I’ll still wear these because they’re a cute basic and I’d possibly buy them again once I feel more comfortable with my weight.
tldr;
Good quality, fit nicely. I’d love a little more tummy-tucking support. Would possibly buy again.